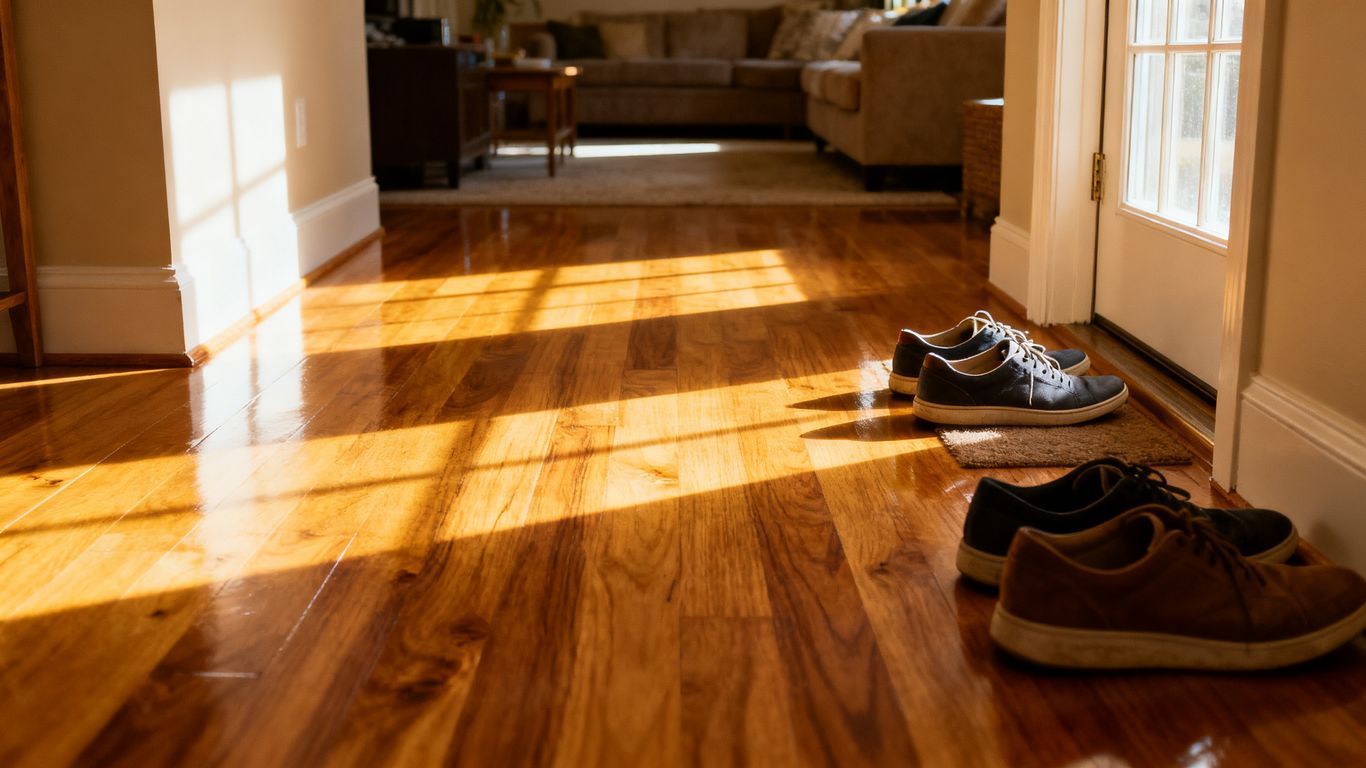
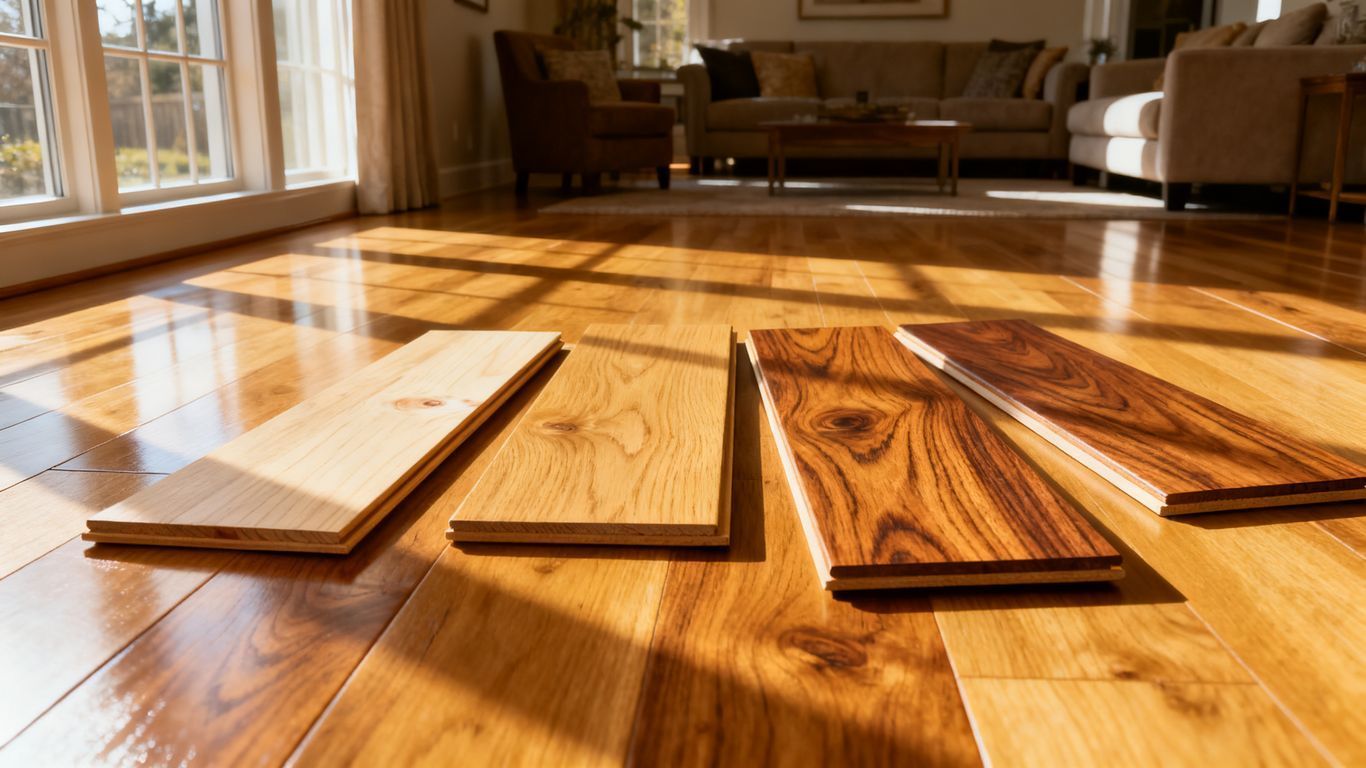
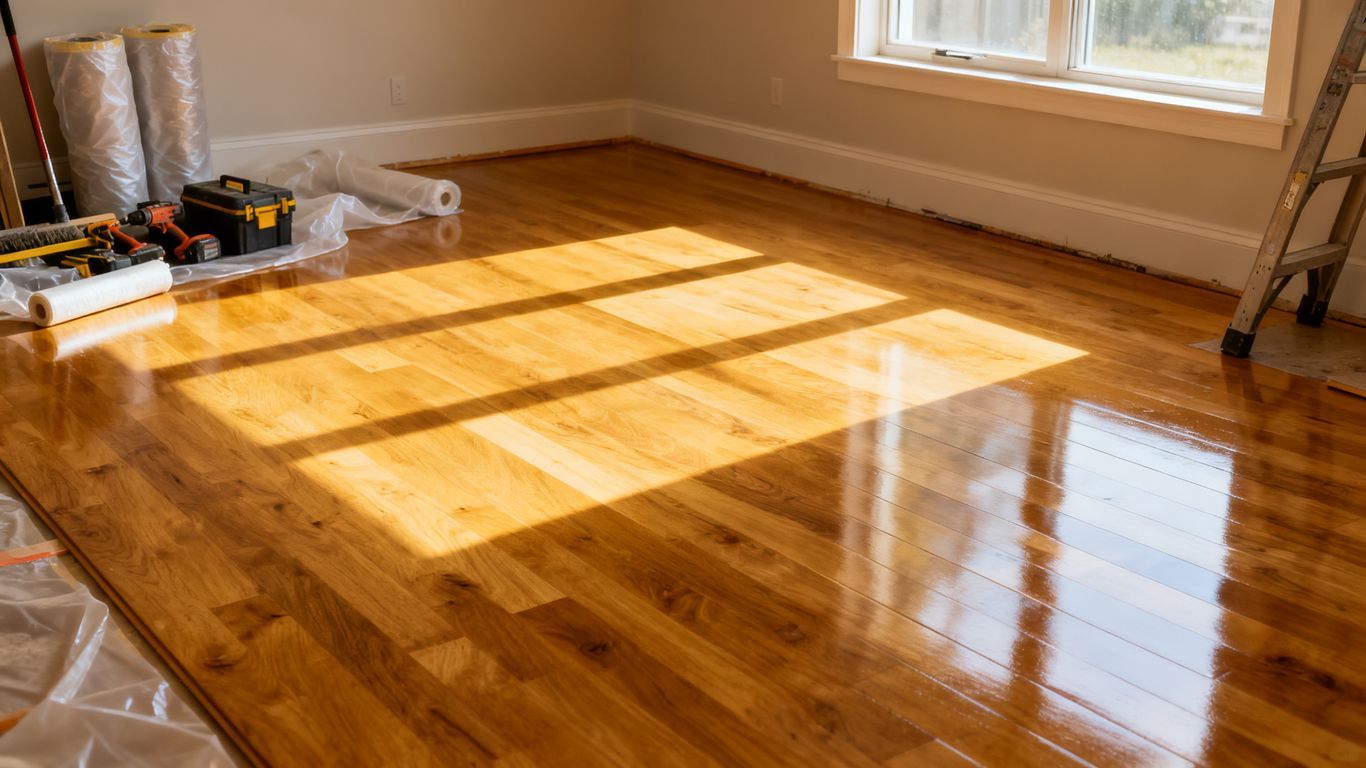
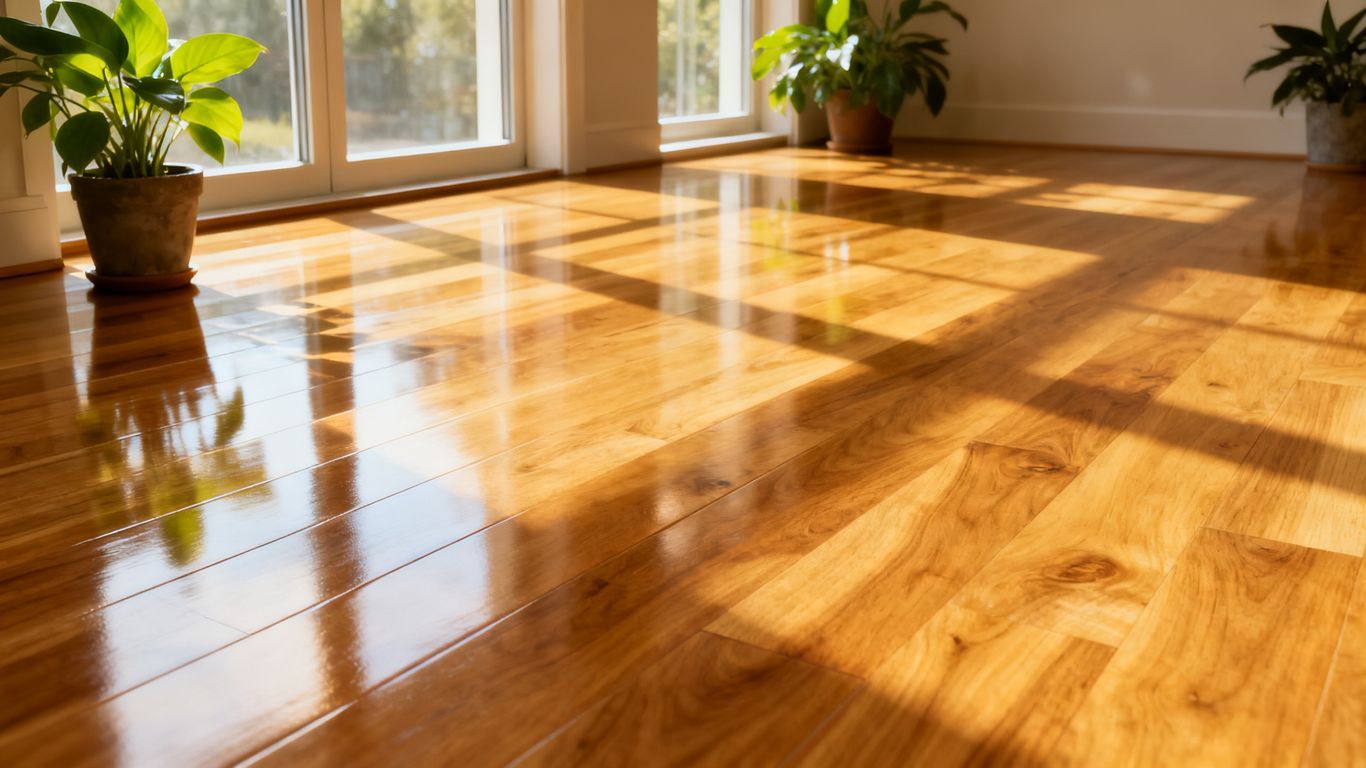
Summer can be tough on your hardwood floors, bringing issues like warping and cupping. Here are the main things to remember to keep your floors in good shape. Key Takeaways Wood expands and contracts with changes in humidity and temperature, which can lead to warping and cupping. Use dehumidifiers and proper ventilation to keep indoor humidity levels steady, ideally between 35-55%. Maintain a consistent indoor temperature, avoiding big swings that stress the wood. Good airflow, especially from your HVAC system, helps prevent moisture buildup. Protect floors with rugs, seal them properly, and clean up spills right away. Understanding Summer's Impact On Your Hardwood Floor Summer. It's usually a time for fun, but for your hardwood floors, it can be a bit of a challenge. Wood is a natural material, and like most things in nature, it reacts to its surroundings. The biggest players in this summer drama are humidity and temperature. Humidity's Role In Wood Expansion Think of wood like a sponge. When the air gets thick with moisture, especially during those sticky summer months, the wood in your floor starts to soak it up. This absorbed moisture causes the wood fibers to swell. It's this expansion that leads to common issues like cupping and crowning. Cupping: This is when the edges of your floorboards are higher than the center, making them look like little canoes. It happens because the bottom of the board is getting more moisture than the top. You can learn more about wood floor cupping occurs. Crowning: This is the opposite of cupping, where the center of the board is higher than the edges. It's less common but still a sign of moisture trouble. Gapping: While less common in summer (more of a winter issue), extreme moisture changes can sometimes cause boards to pull apart if they've previously swollen and then dried out too quickly. Wood doesn't just expand and contract randomly. It's a direct response to the moisture content in the air around it. High humidity means more water molecules getting into the wood, pushing those fibers apart. Temperature Fluctuations And Wood Movement Besides humidity, the heat of summer also plays a part. While wood doesn't expand and contract with temperature as much as it does with moisture, significant temperature swings can still stress your floors. When temperatures rise, the air holds more moisture, compounding the problem. If you're constantly turning the AC on and off, you're creating these swings. Common Signs Of Hardwood Floor Warping So, how do you know if your floors are starting to protest the summer weather? Keep an eye out for these signs: Visible Gaps: You might notice small spaces appearing between your floorboards, especially if they've recently dried out after being exposed to moisture. Uneven Surfaces: Boards that feel soft or spongy underfoot, or ones that are noticeably higher or lower than their neighbors, are a clear indicator. Sound Changes: Sometimes, as wood moves, it can start to creak or groan more than usual. This might be a subtle sign that something's up. If you're seeing these issues, it's a good idea to investigate the cause. Sometimes, it's just a temporary reaction to the weather, but other times, it can point to a more serious problem, like undetected leaks or other hidden water sources that are saturating the wood. Controlling Indoor Humidity To Prevent Hardwood Floor Warping Summer air can be a real challenge for your hardwood floors. That sticky, humid air outside often finds its way inside, and wood, well, it doesn't like that one bit. It soaks up moisture and swells, leading to all sorts of problems like cupping and warping. Keeping your indoor humidity in check is probably the single most important thing you can do to protect your floors during these warmer months. Using Dehumidifiers Effectively If you live in a place where summer means high humidity, a dehumidifier is your best friend. Don't just plug it in and forget about it, though. You need to use it smartly. Placement Matters: Put your dehumidifier in a central location or in areas prone to dampness, like basements or bathrooms. Set It Right: Aim for a humidity level between 35% and 55%. Too low and the wood can shrink, too high and it swells. Empty It Regularly: Make sure to empty the water tank often, or set up a continuous drain if your model allows. A full tank means a useless machine. Over-reliance on air conditioning can sometimes dry out the air too much, especially in less humid climates. It's a balancing act, and sometimes you might even need a humidifier in the winter and a dehumidifier in the summer. Ventilation Strategies For Moisture Management Good airflow is key to preventing moisture buildup. Think about how you can get that humid air moving out and drier air circulating in. Open Windows (When Appropriate): On days when the outside air is less humid than inside, opening windows can help. But be smart about it – don't let more moisture in! Use Fans: Ceiling fans and portable fans help keep the air moving, which discourages moisture from settling. Check Your HVAC: Your home's heating, ventilation, and air conditioning system plays a big role. Make sure it's working efficiently and that the filters are clean. A well-maintained system can help regulate humidity. Monitoring Humidity Levels Year-Round Don't just think about humidity in the summer. Wood floors are affected by moisture changes all year long. You really need to keep an eye on things. Get a Hygrometer: This simple device measures the humidity in your home. They're inexpensive and give you real-time readings. Know Your Wood's Needs: Different types of wood have slightly different ideal moisture content levels. A quick search for your specific flooring type can give you a target range. Learn about wood moisture. Adjust as Needed: Based on your hygrometer readings, you'll know when to run your dehumidifier, humidifier, or just adjust your ventilation. Being proactive means fewer surprises down the road. Illinois homeowners often find this especially helpful during humid summers. Dealing with humidity might seem like a chore, but it's way easier than fixing warped floors. A little effort now can save you a lot of headaches and money later. Maintaining Optimal Temperature For Wood Floor Stability Wood is a natural material, and like most things in nature, it reacts to its surroundings. When it comes to your hardwood floors, temperature plays a big role in how stable they stay. Summer heat, especially when it's combined with fluctuating humidity, can really stress out your wood. Keeping a steady temperature is key to preventing problems like warping and cupping. It's not just about comfort; it's about protecting your investment. Avoiding Extreme Temperature Swings Think about how your house feels on a really hot day versus a cooler evening. That change in temperature causes the wood in your floors to expand and contract. Do this too often, or too drastically, and the wood can start to pull away from itself, leading to those annoying gaps or even buckling. It’s best to avoid those wild temperature swings. Try to keep your indoor climate as consistent as possible, even when you're not home. This helps the wood settle into a more stable state. The Benefits Of Consistent Climate Control When you maintain a steady temperature, you're giving your hardwood floors the best chance to stay flat and look great. It reduces the stress on the wood's fibers. This means fewer worries about gaps appearing between planks or the edges lifting. Consistent climate control also helps finishes last longer and keeps the overall look of your floor looking fresh. It's a simple step that makes a big difference in the long run for your home's flooring. Smart Thermostat Usage For Wood Floors Using a smart thermostat can be a real game-changer for managing your home's temperature, especially for wood floors. You can program it to keep things steady throughout the day and night, avoiding those sharp temperature drops or spikes. Many smart thermostats even learn your habits and adjust automatically. This means you can save energy without sacrificing the stability of your floors. It's a smart way to manage both comfort and floor care, especially when you're thinking about refinishing floors. The goal is to create an environment where your wood floors can thrive, not just survive. This means thinking about temperature as a constant factor in their upkeep, just like cleaning or avoiding water damage. A little attention to temperature control goes a long way in keeping your floors looking their best for years to come. Proper Ventilation And Airflow To Combat Cupping Summer heat and humidity can really do a number on your hardwood floors, sometimes leading to that annoying cupping effect where the edges of the planks lift up. It's like the wood is trying to shrug off the moisture. Good airflow is your best friend here, helping to keep things balanced. Ensuring Good Air Circulation Think of your house like a body; it needs to breathe. When air gets stagnant, moisture can build up in places you don't want it, especially around your floors. Proper circulation helps to distribute air evenly, preventing pockets of high humidity that can cause problems. This means opening windows when the outside air is cooler and less humid, and using fans to keep air moving. Here are a few ways to get that air flowing: Use ceiling fans to create a gentle breeze throughout your rooms. Place portable fans strategically in areas where air seems to get stuck. Make sure furniture isn't blocking vents or radiators, which are part of your home's air system. The Importance Of HVAC System Maintenance Your heating, ventilation, and air conditioning (HVAC) system plays a big role in managing indoor air quality and humidity. If your system isn't running efficiently, it can't do its job properly. Regular check-ups are a good idea, especially before the peak summer season hits. A well-maintained HVAC system can help regulate both temperature and humidity, creating a more stable environment for your wood floors. It's not just about comfort; it's about preservation. This includes changing air filters regularly. Dirty filters make your system work harder and can restrict airflow. If you're noticing uneven temperatures or dampness, it might be time to call in a professional to look at your HVAC system. Addressing Moisture Buildup In Basements And Crawl Spaces These areas are often the hidden culprits behind high indoor humidity. Basements and crawl spaces can trap moisture, which then rises into your living areas and affects your floors. You might not see it, but your wood floors definitely feel it. Check for any signs of leaks or water intrusion in these lower levels. Consider using a dehumidifier specifically for your basement or crawl space. Ensure proper drainage around your home's foundation to prevent water from seeping in. Dealing with moisture in these spots can make a big difference in preventing cupping and other wood floor issues. Sometimes, minor cupping can even resolve itself once humidity levels are brought back into balance, often with the help of fans and dehumidifiers over a few weeks, which can flatten out a good portion of the problem naturally. Protective Measures Against Summer Moisture Summer brings heat, and often, a lot of humidity. This extra moisture in the air can really do a number on your hardwood floors if you're not careful. Think of wood like a sponge; it absorbs moisture and swells up. When it dries out, it shrinks. This constant back-and-forth is what causes all sorts of problems, like warping and cupping. But don't worry, there are definitely things you can do to shield your floors from this summer onslaught. Sealing and Finishing Your Hardwood Floors One of the best lines of defense you have is the finish on your hardwood floors. A good quality sealant acts like a barrier, preventing moisture from soaking directly into the wood. Over time, this finish can wear down, especially in high-traffic areas. Regularly inspecting your floors and reapplying a protective finish can make a big difference. It's not just about looks; it's about keeping your floors healthy. Think of it like putting on sunscreen before a day at the beach – it protects you from the sun's harsh rays, and a good finish protects your floors from moisture. Inspect the finish: Look for dull spots, scratches, or areas where the finish seems thin. Clean thoroughly: Before applying any new finish, make sure the floor is spotless. Apply evenly: Use the right applicator and follow the product instructions for a smooth, consistent coat. Allow proper drying: Give the finish enough time to cure completely before walking on it or placing furniture back. A well-maintained finish is your floor's first line of defense against moisture. Don't underestimate its power. Using Area Rugs Strategically Area rugs aren't just for decoration; they can be a smart tool for managing moisture. Placing rugs in areas prone to spills or high foot traffic, like entryways and kitchens, can help absorb small amounts of moisture before they reach the wood. They also provide a bit of insulation, which can help moderate temperature changes. Just remember to lift and clean under your rugs periodically to prevent moisture from getting trapped underneath. This is especially important if you have rugs that don't breathe well. Learn about floor issues that can arise from moisture. Promptly Addressing Spills and Leaks This might sound obvious, but it's worth repeating: clean up spills immediately. Even a small amount of water left to sit can start to seep into the wood. This applies to more than just drinks; think about water tracked in from outside, pet accidents, or even leaks from potted plants. Having a plan for quick cleanup is key. Keep a dry cloth or paper towels handy in common areas. For bigger issues, like a leaky pipe or appliance, address the source of the leak right away and then focus on drying out the affected floor area. Controlling humidity is also a big part of this. When To Seek Professional Help For Hardwood Floor Warping Sometimes, despite your best efforts, hardwood floors can get pretty messed up. You've tried the dehumidifier, you've watched the humidity levels, but things just aren't getting better. It's okay to admit when a job is bigger than you thought. Knowing when to call in the pros is a sign of smart homeownership, not failure. Identifying Severe Cupping And Warping Not all floor issues are created equal. A little bit of movement is normal, especially with seasonal changes. But when you start seeing some serious problems, it's time to pay attention. Look out for these signs: Pronounced Edges: The edges of your floorboards are noticeably higher than the center, making the floor feel uneven underfoot. Visible Gaps: Significant gaps appear between boards, or boards pull away from walls. Sound Changes: You start hearing creaking or popping sounds more often than usual. Surface Damage: The finish cracks or peels, or the wood itself starts to splinter. If your floor looks like a series of tiny hills and valleys, it's probably beyond simple DIY fixes. You might need to look into repairing damaged hardwood floors. Consulting Flooring Specialists When you're unsure about the extent of the damage or how to fix it, a flooring specialist is your best bet. They have the experience to diagnose the exact cause of the warping and recommend the right course of action. They can tell you if the issue is just cosmetic or if it's affecting the structural integrity of your floor. They'll also know if your specific type of wood, like engineered hardwood, can be salvaged. Sometimes, they can even work magic and bring a badly warped floor back to life. Dealing with warped floors can be a real headache. It's easy to get overwhelmed by the options or the sheer scale of the problem. Remember that professionals have seen it all before and have tools and techniques you likely don't have access to. They can assess the situation accurately and provide a clear plan. Repairing Damaged Hardwood Floors Depending on the severity, a professional might suggest a few different solutions. For minor issues, they might be able to re-dry the wood and apply specific treatments. If the damage is more widespread, they might need to replace individual boards or sections of the floor. In some cases, especially with significant water damage, a full replacement might be the only option to get your home back in shape. Don't hesitate to get a few quotes from different specialists to compare their assessments and costs. If your hardwood floors are starting to bend or curve, it's a sign that something isn't right. Don't wait for the problem to get worse! Addressing warping early can save you a lot of trouble and money down the line. If you notice your floors changing shape, it's time to get expert advice . Visit our website today to learn more about how we can help fix your warped floors and restore their beauty. Conclusion Keeping your hardwood floors looking great through the summer doesn't have to be a huge chore. By paying attention to humidity and temperature, you can prevent common problems like warping and cupping. Simple steps like using a dehumidifier, keeping your home at a steady temperature, and making sure air can move around freely go a long way. Remember to also protect your floors from spills and consider professional help if you notice serious issues. A little bit of care now means beautiful floors for years to come. Frequently Asked Questions Why does my hardwood floor warp in the summer? Wood is like a sponge for moisture. When the air gets really humid in the summer, the wood in your floor soaks up that extra moisture and swells. This swelling can push the boards out of shape, causing them to warp or cup. What is the difference between warping and cupping? Think of 'cupping' like a U-shape, where the edges of the floorboards are higher than the middle. 'Warping' is a more general term for when the wood twists or bends out of its flat shape. Cupping is a type of warping caused by moisture differences. How can I lower the humidity in my house? The easiest way is to use a dehumidifier. You can also use your air conditioner, as it naturally removes moisture from the air. Opening windows can help sometimes, but if it's very humid outside, it might make things worse. Is it okay to have area rugs on my hardwood floors? Yes, area rugs can actually help! They act as a protective layer and can help keep the wood underneath from absorbing too much moisture from the air or getting scratched. Just make sure they don't trap moisture underneath them. How often should I check my floor's condition? It's a good idea to give your floors a quick look every week or so, especially during the humid summer months. Keep an eye out for any boards that look like they're lifting, bending, or changing color. Catching problems early makes them easier to fix. When should I call a professional for floor problems? If you see big gaps between boards, boards that are lifting significantly off the floor, or if the cupping or warping looks really bad and covers a large area, it's time to call a flooring expert. They can figure out what's wrong and how to fix it properly.
Considering hardwood floor installation in May? Discover why this month offers ideal conditions for a beautiful, lasting floor.
Compare hardwood floors vs vinyl and tile vs hardwood for summer comfort. Discover cooling properties and maintenance tips.
Get your hardwood floor prep for guests right! Ensure your floors shine for spring & summer events. Learn cleaning, repair & protection tips.
Discover the best hardwood flooring TN GA options for your home. Explore popular choices like oak, pine, and hickory.
Get your home ready for hardwood floor installation prep this spring. Learn essential steps for a smooth and successful project.
Discover how hardwood floors improve indoor air quality by reducing VOCs. Learn about sustainable choices & maintenance for a healthier home.
Understand the hardwood floor installation timeline. Learn factors, prep, installation, and finishing times for your project.
Learn the hardwood floor refinishing process. From prep to sealing, understand what to expect for beautiful, lasting floors.
Is April a good time for hardwood floor installation Tennessee? Learn about climate, benefits, and expert tips.