How to Fix Squeaky Wood Floors Before Holiday Guests Arrive

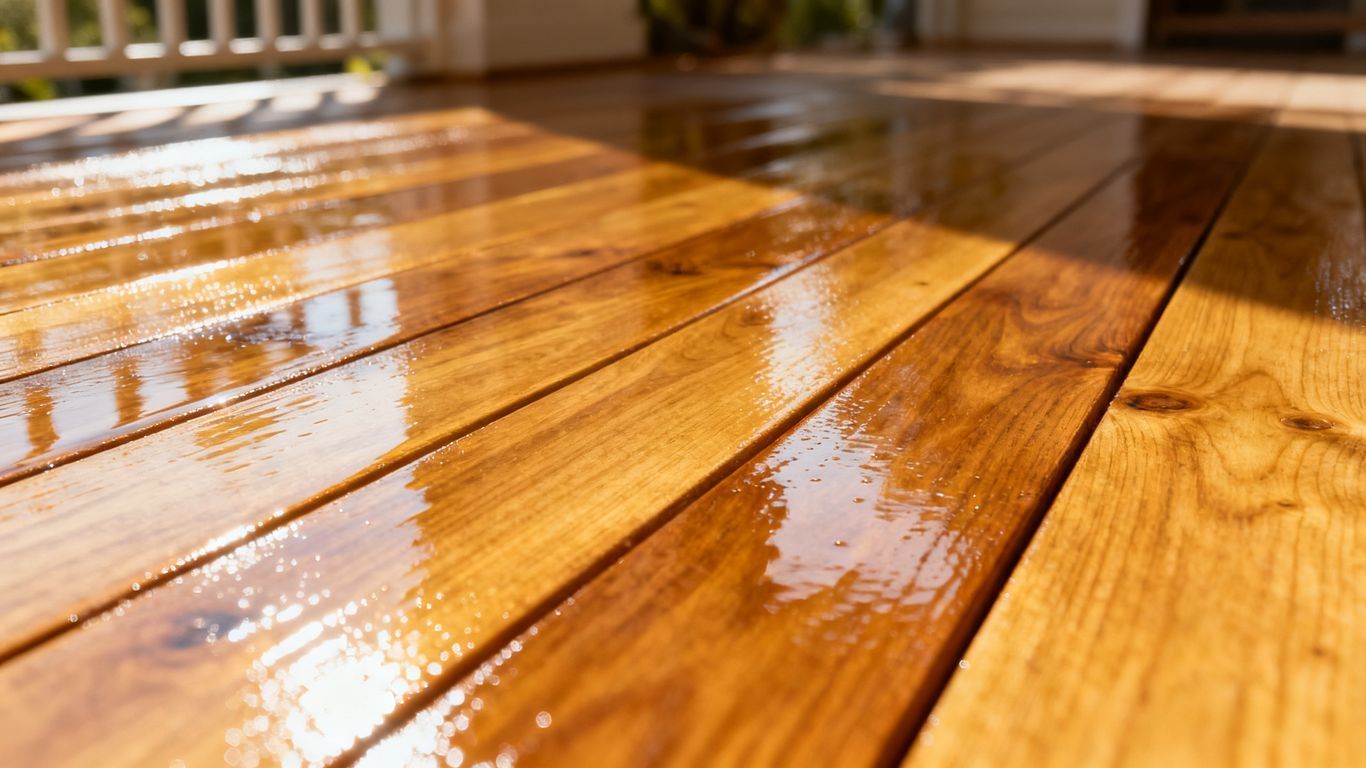
The holidays are almost here, and the last thing you want is for every step in your home to be announced with a squeak. Noisy wood floors can be distracting—and a little embarrassing—when family and friends are visiting. The good news? Many squeaks can be fixed before your guests arrive, even if you’re not a hardcore DIYer.

In this guide, we’ll show you how to track down squeaks, try simple fixes, and recognize when it’s time to call in the pros. And if you’re looking to fix squeaky hardwood floors in Chattanooga, First Class Wood Floors offers professional hardwood floor repair and refinishing to help get your home holiday-ready.

Key Takeaways

  • Find the exact location of the squeak by slowly walking the area and listening carefully.
  • Determine whether the noise is coming from loose floorboards or from the subfloor underneath.
  • Start with simple fixes like dry lubricants (talcum or graphite) and tightening loose boards.
  • Subfloor issues may require access from below to add shims or screws to secure the floor.
  • For widespread squeaks or structural concerns, it’s best to call a professional—especially if you’re in the Chattanooga area.

1. Identify the Source of Your Squeaky Hardwood Floors

Before you grab tools or supplies, it’s important to figure out exactly where—and why—your floors are squeaking. This step saves time and helps you choose the right fix.

Listen for the Exact Location of the Squeak

Start by walking slowly over the noisy area, wearing soft-soled shoes or socks. Pay attention to:

  • Where the squeak is loudest.
  • Whether the noise happens every time you step in that spot.
  • If the sound seems to travel or echo from nearby boards.

It can help to have someone else walk while you listen from different angles. Sometimes the squeak you hear in one board is actually caused by movement in another.

Determine If the Squeak Comes from Loose Boards or the Subfloor

Most squeaks come from movement between two surfaces. That might be:

  • Floorboards rubbing against each other.
  • Floorboards rubbing against nails or fasteners.
  • Subfloor panels rubbing against joists underneath.

Press down on the boards with your foot or hand. If you see or feel movement at the surface, you may be dealing with loose boards. If the surface feels solid but still squeaks, the issue might be lower, at the subfloor or joist level.

Check for Gaps Between Floorboards

Look closely at the boards in the squeaky area:

  • Do you see small gaps between boards?
  • Are some boards slightly higher or lower than others?
  • Do nails or fasteners appear raised or loose?

Seasonal changes in humidity can cause boards to shrink or swell, creating friction between them and leading to squeaks. Addressing these minor shifts early can help prevent more serious issues later on.

2. Simple Fixes for Minor Squeaks

Once you’ve found the squeaky spot, start with the least invasive solutions. These quick fixes are great for small, localized squeaks—perfect for last-minute holiday prep.

Lubricate Between Floorboards

When boards rub together, a dry lubricant can help them glide instead of squeak. Popular options include:

  • Talcum powder (unscented baby powder)
  • Graphite powder
  • Cornstarch (as a temporary option)

How to apply:

  • Sprinkle the powder directly into the gaps between squeaky boards.
  • Use a soft brush or cloth to work the powder down into the cracks.
  • Walk over the area to help the lubricant spread and reduce friction.
  • Wipe away any excess powder from the surface so it doesn’t get tracked around.

Use Talcum or Graphite for Persistent Rubbing

For boards that consistently rub against each other, talcum or graphite can be especially effective. Graphite is more permanent but can be messier—use sparingly and avoid getting it on light-colored surfaces.

Tighten Loose Floorboards

If a board flexes or shifts when you step on it, tightening it may quiet the squeak. Some homeowners use specialized floor repair kits that allow you to drive small screws through the floor and into the subfloor with minimal visibility.

  • Pre-drill small pilot holes to prevent splitting.
  • Use trim-head screws or kit-specific fasteners for a low-profile look.
  • Fill the screw heads with color-matched wood filler if needed.

These surface-level fixes are ideal if the squeak is isolated to one or two boards and the structure beneath is sound.

3. Addressing Squeaks from the Subfloor

If the squeak isn’t coming from the floorboards themselves, the problem may lie in the subfloor or joists. This is more common in older homes or areas with high traffic.

Access the Subfloor from Below

If you have an unfinished basement or crawl space, you can often reach the underside of the squeaky area:

  • Have someone walk on the floor above while you listen from below.
  • Use a flashlight to inspect the underside of the subfloor and joists.
  • Look for gaps, loose fasteners, or subfloor panels that flex when someone walks overhead.

Shim Gaps Between Subfloor and Joists

If you find a small gap between the subfloor and a joist, shimming can help:

  • Use thin wood shims designed for structural work.
  • Gently tap the shim into the gap until movement stops—don’t force it.
  • Trim any excess shim material that sticks out.

Shims help fill the space so the subfloor doesn’t move and rub against the joist, which is often the source of a deep, hollow squeak.

Secure the Subfloor with Screws

Loose subfloor panels can also cause squeaks when they flex or move against the joists. Securing them with screws is often more effective than nails:

  • Drive wood screws up through the subfloor into the joists to pull everything tight.
  • Space the screws where you see or feel movement.
  • Avoid over-tightening, which can strip the wood or cause new movement.

Working from below is a bit more involved, but it’s often the most effective way to quiet long-running squeaks that surface fixes can’t solve.

4. Advanced Techniques to Fix Stubborn Squeaks

If the squeak keeps coming back—or if you’re dealing with multiple noisy spots—more advanced repairs may be needed. These methods are still DIY-friendly for handy homeowners but may also be handled by a professional.

Screwing Down Loose Floorboards from Above

When a specific board rocks or flexes, securing it more firmly can help:

  • Locate the joist beneath the squeaky board using a stud finder or by measuring from known joist positions.
  • Pre-drill and countersink holes so screw heads sit slightly below the surface.
  • Drive screws through the board into the subfloor and joist to lock it in place.
  • Fill the holes with matching wood filler and lightly sand if needed.

Using Construction Adhesive

For gaps between subfloor and joists or between floorboards and subfloor, construction adhesive can create a stronger bond:

  • Apply adhesive along the joist where the subfloor is moving.
  • Gently press or screw the subfloor tight to help the adhesive spread.
  • Allow adequate drying time based on the product instructions.

This method is best when you have clear access to the problem area and want a more permanent fix.

Repairing Damaged Subflooring

If you discover rot, water damage, or severely warped subfloor panels, partial replacement may be necessary. This can involve:

  • Cutting out damaged sections of subfloor.
  • Installing new panels securely to the joists.
  • Reattaching or replacing affected floorboards above.

At this stage, many homeowners choose to work with a professional, since structural repairs can affect the integrity and safety of the floor system.

5. When to Call a Professional for Floor Repair

Not every squeak requires a pro—but some definitely benefit from expert attention. Knowing when to make that call can save you time, stress, and money in the long run.

Recognizing Complex Issues

You may want to contact a professional if:

  • Squeaks are widespread throughout multiple rooms.
  • The floor feels spongy, uneven, or noticeably bouncy.
  • You see signs of moisture, warping, or damage around the squeaky areas.
  • Your attempts at DIY repair haven’t made much difference.

In these cases, there may be underlying structural or moisture problems that require more than surface-level fixes.

Finding Local Experts to Fix Squeaky Hardwood Floors in Chattanooga

If you’re in the Chattanooga area and want to fix squeaky hardwood floors before holiday guests arrive, working with a local specialist is a smart move. First Class Wood Floors provides professional hardwood floor repair and refinishing as part of our hardwood flooring services in North Georgia and Chattanooga.

We can inspect your floors, identify the true source of the squeaks, and recommend the right solution—whether that’s targeted repairs, additional fastening, or refinishing.

You can also see our hardwood floor gallery for examples of projects completed across our Chattanooga and surrounding service areas.

6. Preventative Maintenance for Quieter Floors

Once your floors are quiet again, a little preventative care can help keep them that way—through the holidays and beyond.

Maintain Stable Humidity Levels

Wood expands and contracts with changes in temperature and humidity. To reduce movement that can cause squeaks:

  • Use a humidifier in winter and a dehumidifier in very humid seasons if needed.
  • Aim for a consistent indoor humidity level (typically around 35–55%).
  • Avoid extreme temperature swings inside your home.

Protect Floors from Excess Wear

Reducing unnecessary stress on your floors can also help prevent squeaks and other issues:

  • Use felt pads on the bottom of furniture legs.
  • Place area rugs in high-traffic zones, like hallways and entryways.
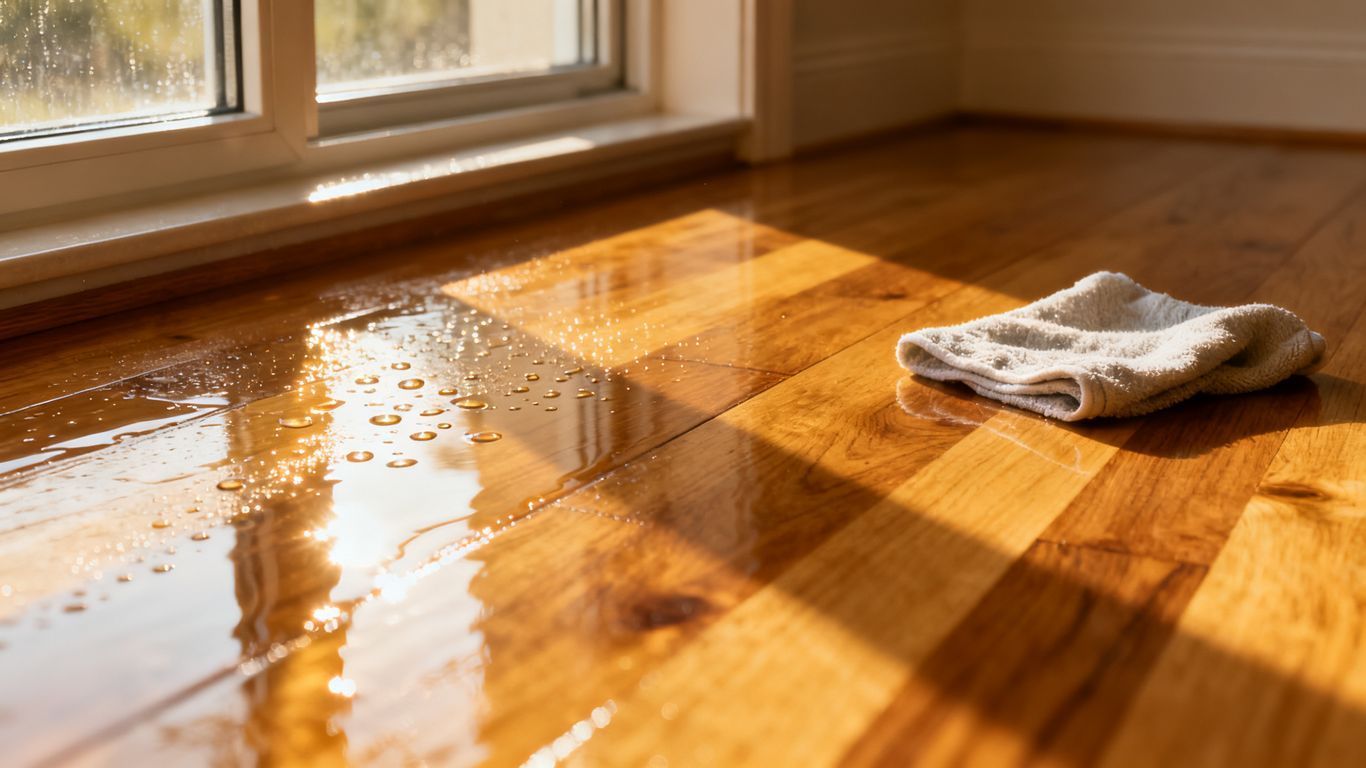
  • Clean up spills quickly to prevent moisture from penetrating seams.

Address Minor Issues Early

If you notice a new squeak, slight movement in a board, or a nail starting to rise, tackle it early. Small repairs made now are often simpler and less expensive than larger fixes later on.

If you’re unsure about the condition of your floors or want a professional opinion before the holidays, you can schedule your squeaky floor inspection with First Class Wood Floors.

All Quiet on the Floor Front

With a little detective work and a few simple repairs, you can quiet those squeaky wood floors and welcome your holiday guests with confidence. Whether you try DIY solutions or bring in a professional, taking action now means more peace and less creaking when your home is full of people.

Ready to enjoy quieter, more comfortable hardwood floors in Chattanooga? Request a floor repair estimate from First Class Wood Floors and we’ll help you get your home holiday-ready.

Frequently Asked Questions

Why do my wood floors make noise when I walk on them?

Wood floors usually squeak because two surfaces are moving against each other—often floorboards against each other, boards against nails, or the subfloor against the joists. As you step, that movement creates friction and noise.

Can I fix squeaky floors myself?

In many cases, yes. Minor squeaks can often be reduced with dry lubricants like talcum or graphite powder, or by tightening a loose board. More complex squeaks involving the subfloor or joists may require additional tools—or a professional.

What’s the easiest way to stop a small squeak?

For small, localized squeaks, sprinkling talcum or graphite powder between the boards and working it into the gaps is one of the quickest solutions. If that doesn’t help, tightening the board with specialized screws may be the next step.

What if the squeak is coming from under the floor?

If the noise is coming from the subfloor or joists, you may need to access the area from a basement or crawl space. Shims and screws can be used to secure loose subfloor sections and stop movement that causes squeaks.

When should I call a professional?

If you’ve tried simple fixes without success, if squeaks are widespread, or if you suspect water damage or structural issues, it’s time to call a pro. A professional can safely diagnose and repair the problem without risking further damage.

How can I prevent my floors from squeaking again?

Keeping indoor humidity stable, protecting floors from heavy impact and wear, and addressing minor issues as soon as you notice them can all help prevent squeaks. Regular inspections and maintenance from a flooring specialist are also a wise investment.

Need help to fix squeaky hardwood floors in Chattanooga before the holidays? Schedule your squeaky floor inspection with First Class Wood Floors today.

hardwood floor warping, cupping
By Rise Design June 14, 2026
Summer can be tough on your hardwood floors, bringing issues like warping and cupping. Here are the main things to remember to keep your floors in good shape. Key Takeaways Wood expands and contracts with changes in humidity and temperature, which can lead to warping and cupping. Use dehumidifiers and proper ventilation to keep indoor humidity levels steady, ideally between 35-55%. Maintain a consistent indoor temperature, avoiding big swings that stress the wood. Good airflow, especially from your HVAC system, helps prevent moisture buildup. Protect floors with rugs, seal them properly, and clean up spills right away. Understanding Summer's Impact On Your Hardwood Floor Summer. It's usually a time for fun, but for your hardwood floors, it can be a bit of a challenge. Wood is a natural material, and like most things in nature, it reacts to its surroundings. The biggest players in this summer drama are humidity and temperature. Humidity's Role In Wood Expansion Think of wood like a sponge. When the air gets thick with moisture, especially during those sticky summer months, the wood in your floor starts to soak it up. This absorbed moisture causes the wood fibers to swell. It's this expansion that leads to common issues like cupping and crowning. Cupping: This is when the edges of your floorboards are higher than the center, making them look like little canoes. It happens because the bottom of the board is getting more moisture than the top. You can learn more about wood floor cupping occurs. Crowning: This is the opposite of cupping, where the center of the board is higher than the edges. It's less common but still a sign of moisture trouble. Gapping: While less common in summer (more of a winter issue), extreme moisture changes can sometimes cause boards to pull apart if they've previously swollen and then dried out too quickly. Wood doesn't just expand and contract randomly. It's a direct response to the moisture content in the air around it. High humidity means more water molecules getting into the wood, pushing those fibers apart. Temperature Fluctuations And Wood Movement Besides humidity, the heat of summer also plays a part. While wood doesn't expand and contract with temperature as much as it does with moisture, significant temperature swings can still stress your floors. When temperatures rise, the air holds more moisture, compounding the problem. If you're constantly turning the AC on and off, you're creating these swings. Common Signs Of Hardwood Floor Warping So, how do you know if your floors are starting to protest the summer weather? Keep an eye out for these signs: Visible Gaps: You might notice small spaces appearing between your floorboards, especially if they've recently dried out after being exposed to moisture. Uneven Surfaces: Boards that feel soft or spongy underfoot, or ones that are noticeably higher or lower than their neighbors, are a clear indicator. Sound Changes: Sometimes, as wood moves, it can start to creak or groan more than usual. This might be a subtle sign that something's up. If you're seeing these issues, it's a good idea to investigate the cause. Sometimes, it's just a temporary reaction to the weather, but other times, it can point to a more serious problem, like undetected leaks or other hidden water sources that are saturating the wood. Controlling Indoor Humidity To Prevent Hardwood Floor Warping Summer air can be a real challenge for your hardwood floors. That sticky, humid air outside often finds its way inside, and wood, well, it doesn't like that one bit. It soaks up moisture and swells, leading to all sorts of problems like cupping and warping. Keeping your indoor humidity in check is probably the single most important thing you can do to protect your floors during these warmer months. Using Dehumidifiers Effectively If you live in a place where summer means high humidity, a dehumidifier is your best friend. Don't just plug it in and forget about it, though. You need to use it smartly. Placement Matters: Put your dehumidifier in a central location or in areas prone to dampness, like basements or bathrooms. Set It Right: Aim for a humidity level between 35% and 55%. Too low and the wood can shrink, too high and it swells. Empty It Regularly: Make sure to empty the water tank often, or set up a continuous drain if your model allows. A full tank means a useless machine. Over-reliance on air conditioning can sometimes dry out the air too much, especially in less humid climates. It's a balancing act, and sometimes you might even need a humidifier in the winter and a dehumidifier in the summer. Ventilation Strategies For Moisture Management Good airflow is key to preventing moisture buildup. Think about how you can get that humid air moving out and drier air circulating in. Open Windows (When Appropriate): On days when the outside air is less humid than inside, opening windows can help. But be smart about it – don't let more moisture in! Use Fans: Ceiling fans and portable fans help keep the air moving, which discourages moisture from settling. Check Your HVAC: Your home's heating, ventilation, and air conditioning system plays a big role. Make sure it's working efficiently and that the filters are clean. A well-maintained system can help regulate humidity. Monitoring Humidity Levels Year-Round Don't just think about humidity in the summer. Wood floors are affected by moisture changes all year long. You really need to keep an eye on things. Get a Hygrometer: This simple device measures the humidity in your home. They're inexpensive and give you real-time readings. Know Your Wood's Needs: Different types of wood have slightly different ideal moisture content levels. A quick search for your specific flooring type can give you a target range. Learn about wood moisture. Adjust as Needed: Based on your hygrometer readings, you'll know when to run your dehumidifier, humidifier, or just adjust your ventilation. Being proactive means fewer surprises down the road. Illinois homeowners often find this especially helpful during humid summers. Dealing with humidity might seem like a chore, but it's way easier than fixing warped floors. A little effort now can save you a lot of headaches and money later. Maintaining Optimal Temperature For Wood Floor Stability Wood is a natural material, and like most things in nature, it reacts to its surroundings. When it comes to your hardwood floors, temperature plays a big role in how stable they stay. Summer heat, especially when it's combined with fluctuating humidity, can really stress out your wood. Keeping a steady temperature is key to preventing problems like warping and cupping. It's not just about comfort; it's about protecting your investment. Avoiding Extreme Temperature Swings Think about how your house feels on a really hot day versus a cooler evening. That change in temperature causes the wood in your floors to expand and contract. Do this too often, or too drastically, and the wood can start to pull away from itself, leading to those annoying gaps or even buckling. It’s best to avoid those wild temperature swings. Try to keep your indoor climate as consistent as possible, even when you're not home. This helps the wood settle into a more stable state. The Benefits Of Consistent Climate Control When you maintain a steady temperature, you're giving your hardwood floors the best chance to stay flat and look great. It reduces the stress on the wood's fibers. This means fewer worries about gaps appearing between planks or the edges lifting. Consistent climate control also helps finishes last longer and keeps the overall look of your floor looking fresh. It's a simple step that makes a big difference in the long run for your home's flooring. Smart Thermostat Usage For Wood Floors Using a smart thermostat can be a real game-changer for managing your home's temperature, especially for wood floors. You can program it to keep things steady throughout the day and night, avoiding those sharp temperature drops or spikes. Many smart thermostats even learn your habits and adjust automatically. This means you can save energy without sacrificing the stability of your floors. It's a smart way to manage both comfort and floor care, especially when you're thinking about refinishing floors. The goal is to create an environment where your wood floors can thrive, not just survive. This means thinking about temperature as a constant factor in their upkeep, just like cleaning or avoiding water damage. A little attention to temperature control goes a long way in keeping your floors looking their best for years to come. Proper Ventilation And Airflow To Combat Cupping Summer heat and humidity can really do a number on your hardwood floors, sometimes leading to that annoying cupping effect where the edges of the planks lift up. It's like the wood is trying to shrug off the moisture. Good airflow is your best friend here, helping to keep things balanced. Ensuring Good Air Circulation Think of your house like a body; it needs to breathe. When air gets stagnant, moisture can build up in places you don't want it, especially around your floors. Proper circulation helps to distribute air evenly, preventing pockets of high humidity that can cause problems. This means opening windows when the outside air is cooler and less humid, and using fans to keep air moving. Here are a few ways to get that air flowing: Use ceiling fans to create a gentle breeze throughout your rooms. Place portable fans strategically in areas where air seems to get stuck. Make sure furniture isn't blocking vents or radiators, which are part of your home's air system. The Importance Of HVAC System Maintenance Your heating, ventilation, and air conditioning (HVAC) system plays a big role in managing indoor air quality and humidity. If your system isn't running efficiently, it can't do its job properly. Regular check-ups are a good idea, especially before the peak summer season hits. A well-maintained HVAC system can help regulate both temperature and humidity, creating a more stable environment for your wood floors. It's not just about comfort; it's about preservation. This includes changing air filters regularly. Dirty filters make your system work harder and can restrict airflow. If you're noticing uneven temperatures or dampness, it might be time to call in a professional to look at your HVAC system. Addressing Moisture Buildup In Basements And Crawl Spaces These areas are often the hidden culprits behind high indoor humidity. Basements and crawl spaces can trap moisture, which then rises into your living areas and affects your floors. You might not see it, but your wood floors definitely feel it. Check for any signs of leaks or water intrusion in these lower levels. Consider using a dehumidifier specifically for your basement or crawl space. Ensure proper drainage around your home's foundation to prevent water from seeping in. Dealing with moisture in these spots can make a big difference in preventing cupping and other wood floor issues. Sometimes, minor cupping can even resolve itself once humidity levels are brought back into balance, often with the help of fans and dehumidifiers over a few weeks, which can flatten out a good portion of the problem naturally. Protective Measures Against Summer Moisture Summer brings heat, and often, a lot of humidity. This extra moisture in the air can really do a number on your hardwood floors if you're not careful. Think of wood like a sponge; it absorbs moisture and swells up. When it dries out, it shrinks. This constant back-and-forth is what causes all sorts of problems, like warping and cupping. But don't worry, there are definitely things you can do to shield your floors from this summer onslaught. Sealing and Finishing Your Hardwood Floors One of the best lines of defense you have is the finish on your hardwood floors. A good quality sealant acts like a barrier, preventing moisture from soaking directly into the wood. Over time, this finish can wear down, especially in high-traffic areas. Regularly inspecting your floors and reapplying a protective finish can make a big difference. It's not just about looks; it's about keeping your floors healthy. Think of it like putting on sunscreen before a day at the beach – it protects you from the sun's harsh rays, and a good finish protects your floors from moisture. Inspect the finish: Look for dull spots, scratches, or areas where the finish seems thin. Clean thoroughly: Before applying any new finish, make sure the floor is spotless. Apply evenly: Use the right applicator and follow the product instructions for a smooth, consistent coat. Allow proper drying: Give the finish enough time to cure completely before walking on it or placing furniture back. A well-maintained finish is your floor's first line of defense against moisture. Don't underestimate its power. Using Area Rugs Strategically Area rugs aren't just for decoration; they can be a smart tool for managing moisture. Placing rugs in areas prone to spills or high foot traffic, like entryways and kitchens, can help absorb small amounts of moisture before they reach the wood. They also provide a bit of insulation, which can help moderate temperature changes. Just remember to lift and clean under your rugs periodically to prevent moisture from getting trapped underneath. This is especially important if you have rugs that don't breathe well. Learn about floor issues that can arise from moisture. Promptly Addressing Spills and Leaks This might sound obvious, but it's worth repeating: clean up spills immediately. Even a small amount of water left to sit can start to seep into the wood. This applies to more than just drinks; think about water tracked in from outside, pet accidents, or even leaks from potted plants. Having a plan for quick cleanup is key. Keep a dry cloth or paper towels handy in common areas. For bigger issues, like a leaky pipe or appliance, address the source of the leak right away and then focus on drying out the affected floor area. Controlling humidity is also a big part of this. When To Seek Professional Help For Hardwood Floor Warping Sometimes, despite your best efforts, hardwood floors can get pretty messed up. You've tried the dehumidifier, you've watched the humidity levels, but things just aren't getting better. It's okay to admit when a job is bigger than you thought. Knowing when to call in the pros is a sign of smart homeownership, not failure. Identifying Severe Cupping And Warping Not all floor issues are created equal. A little bit of movement is normal, especially with seasonal changes. But when you start seeing some serious problems, it's time to pay attention. Look out for these signs: Pronounced Edges: The edges of your floorboards are noticeably higher than the center, making the floor feel uneven underfoot. Visible Gaps: Significant gaps appear between boards, or boards pull away from walls. Sound Changes: You start hearing creaking or popping sounds more often than usual. Surface Damage: The finish cracks or peels, or the wood itself starts to splinter. If your floor looks like a series of tiny hills and valleys, it's probably beyond simple DIY fixes. You might need to look into repairing damaged hardwood floors. Consulting Flooring Specialists When you're unsure about the extent of the damage or how to fix it, a flooring specialist is your best bet. They have the experience to diagnose the exact cause of the warping and recommend the right course of action. They can tell you if the issue is just cosmetic or if it's affecting the structural integrity of your floor. They'll also know if your specific type of wood, like engineered hardwood, can be salvaged. Sometimes, they can even work magic and bring a badly warped floor back to life. Dealing with warped floors can be a real headache. It's easy to get overwhelmed by the options or the sheer scale of the problem. Remember that professionals have seen it all before and have tools and techniques you likely don't have access to. They can assess the situation accurately and provide a clear plan. Repairing Damaged Hardwood Floors Depending on the severity, a professional might suggest a few different solutions. For minor issues, they might be able to re-dry the wood and apply specific treatments. If the damage is more widespread, they might need to replace individual boards or sections of the floor. In some cases, especially with significant water damage, a full replacement might be the only option to get your home back in shape. Don't hesitate to get a few quotes from different specialists to compare their assessments and costs. If your hardwood floors are starting to bend or curve, it's a sign that something isn't right. Don't wait for the problem to get worse! Addressing warping early can save you a lot of trouble and money down the line. If you notice your floors changing shape, it's time to get expert advice . Visit our website today to learn more about how we can help fix your warped floors and restore their beauty. Conclusion Keeping your hardwood floors looking great through the summer doesn't have to be a huge chore. By paying attention to humidity and temperature, you can prevent common problems like warping and cupping. Simple steps like using a dehumidifier, keeping your home at a steady temperature, and making sure air can move around freely go a long way. Remember to also protect your floors from spills and consider professional help if you notice serious issues. A little bit of care now means beautiful floors for years to come. Frequently Asked Questions Why does my hardwood floor warp in the summer? Wood is like a sponge for moisture. When the air gets really humid in the summer, the wood in your floor soaks up that extra moisture and swells. This swelling can push the boards out of shape, causing them to warp or cup. What is the difference between warping and cupping? Think of 'cupping' like a U-shape, where the edges of the floorboards are higher than the middle. 'Warping' is a more general term for when the wood twists or bends out of its flat shape. Cupping is a type of warping caused by moisture differences. How can I lower the humidity in my house? The easiest way is to use a dehumidifier. You can also use your air conditioner, as it naturally removes moisture from the air. Opening windows can help sometimes, but if it's very humid outside, it might make things worse. Is it okay to have area rugs on my hardwood floors? Yes, area rugs can actually help! They act as a protective layer and can help keep the wood underneath from absorbing too much moisture from the air or getting scratched. Just make sure they don't trap moisture underneath them. How often should I check my floor's condition? It's a good idea to give your floors a quick look every week or so, especially during the humid summer months. Keep an eye out for any boards that look like they're lifting, bending, or changing color. Catching problems early makes them easier to fix. When should I call a professional for floor problems? If you see big gaps between boards, boards that are lifting significantly off the floor, or if the cupping or warping looks really bad and covers a large area, it's time to call a flooring expert. They can figure out what's wrong and how to fix it properly.
hardwood floor installation May
By Rise Design May 7, 2026
Considering hardwood floor installation in May? Discover why this month offers ideal conditions for a beautiful, lasting floor.
hardwood floors vs vinyl, tile vs hardwood
By Rise Design May 7, 2026
Compare hardwood floors vs vinyl and tile vs hardwood for summer comfort. Discover cooling properties and maintenance tips.
hardwood floor prep for guests
By Rise Design May 7, 2026
Get your hardwood floor prep for guests right! Ensure your floors shine for spring & summer events. Learn cleaning, repair & protection tips.
best hardwood flooring TN GA
By Rise Design May 7, 2026
Discover the best hardwood flooring TN GA options for your home. Explore popular choices like oak, pine, and hickory.
hardwood floor installation prep
By Rise Design May 7, 2026
Get your home ready for hardwood floor installation prep this spring. Learn essential steps for a smooth and successful project.
hardwood floors indoor air quality
By Rise Design May 7, 2026
Discover how hardwood floors improve indoor air quality by reducing VOCs. Learn about sustainable choices & maintenance for a healthier home.
hardwood floor installation timeline
By Rise Design May 7, 2026
Understand the hardwood floor installation timeline. Learn factors, prep, installation, and finishing times for your project.
hardwood floor refinishing process
By Rise Design May 7, 2026
Learn the hardwood floor refinishing process. From prep to sealing, understand what to expect for beautiful, lasting floors.
hardwood floor installation Tennessee
By Rise Design April 6, 2026
Is April a good time for hardwood floor installation Tennessee? Learn about climate, benefits, and expert tips.
Show More